




Garlic
Grow
allium sativum, ‘slayer of monsters’, scorodon, ‘poor man’s treacle’
Pound for pound there is no greater garden gold than garlic. It is the ultimate cash crop (organic garlic costs about £18 per kilo) and with the right preparation is about as easy as anything you’ll grow in your garden. One clove planted now should, by next June, have become a fistful of between six and twenty juicy, fat, pungent cloves with which you can kick start an array of culinary triumphs. Garlic grown in cooler areas is said to be more productive and have better flavour.
When garlic is cut, crushed or chewed an amino acid Alliin combines with an enzyme called alliinase to start a chemical reaction that forms Allicin. Allicin is garlic’s proverbial ‘magic bullet’ which is said to have strong antibiotic properties. Studies have shown that the vapours alone from crushed garlic have killed bacteria placed 8 inches away from the garlic itself.
In a nutshell
- Full sun
- Free draining soil
- Easy to grow
- Money saver
- Stores well
Quantity
10 plants per person
Companions
- Carrot
- Cabbage
- Lettuce
- Beetroot
- Strawberry
- Chard

The growing lifecycle

Seed garlic ready for planting out in the garden

Break up your fists of Garlic into individual cloves

Garlic

Planting Garlic in rows along a raised bed

Space your garlic cloves according to variety

Make a small hole about the same width as your Garlic cloves

Place Garlic cloves into each hole ensuring that the pointed end is upwards

Backfill over each clove with soil
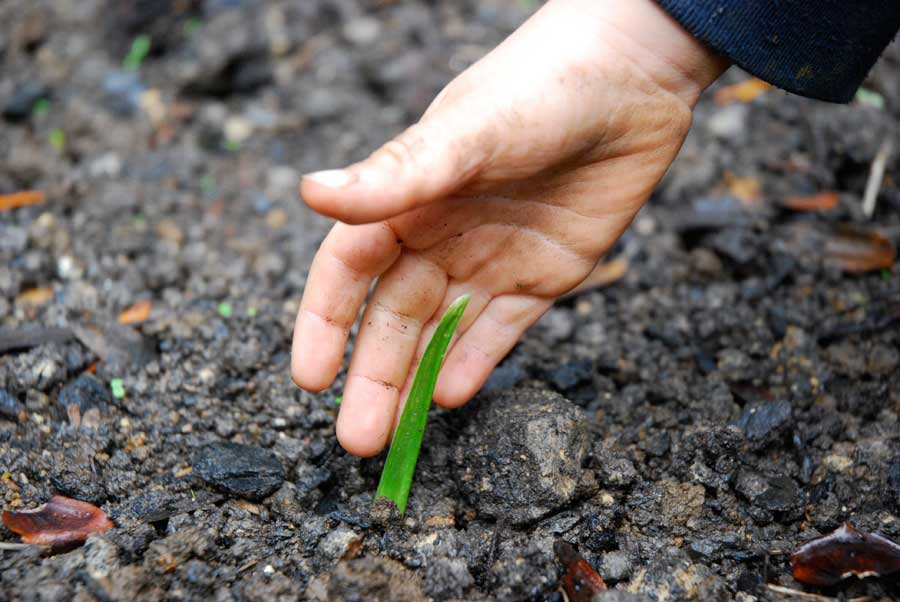
A Garlic shoot, a sign of promising things to come

Garlic in the early stages of growing

A Hardneck Garlic scape - or flower

Mature Garlic shoots, signs of yellowing are an indication that they are getting close to harvest

Harvesting Garlic, once you have pulled your fists let them dry out. Try using some freshly picked Garlic in soups and dressings.
Garlic, dried and ready for storage - or use
Top 4 varieties
1. Germidour
Softneck variety. Produces impressive white-skinned cloves that store very well. Mild in flavour and very popular.
2. Solent Wight
Very popular softneck variety. Stores longer than other varieties. Bred on the Isle of Wight 'Solent Wight' grows well throughout the UK.
3. Carcassonne Wight
A hardneck variety that originates from South West France, white-skinned cloves with excellent strong flavour. Short storage period (till mid-winter).
4. Elephant
A huge growing hardneck variety that is actually more leek than garlic. Nevertheless it produces large bulbs that are fun to grow and great for roasting. You really feel like you have achieved something when you pull up a bunch of this! Not so good as a cooking ingredient due to mild flavour.
Getting started
When
Plant between October and February and harvest June to August.
There are two main groups of garlic – ‘softneck’ which store very well with crowded small cloves and ‘hardneck’ that many feel has a stronger flavour. ‘Hardneck’ has fewer, but larger and more uniform cloves that peel easily but don’t store well for long periods.
Where
Garlic likes to grow in the sun so move your lounger and your deck chairs and dig a bed if you haven’t already got one in the right spot right now. Alternatively you can grow it in containers – like pots or buckets – with drainage holes in the bottom.
Soil
Garlic grows best in soil that your hand might feel comfortable pushing its way through – loose, deep and without any lumps or a soggy bottom. It likes good drainage and that’s why people always go on about planting it in ‘raised beds’ because excess water runs away from the soil more quickly.
Ideally you have pre-composted the planting area and it is now full of well-rotted manure, kitchen compost, leaf mould etc. and well dug over. Should be like a crumble mix before it goes into the oven. Soils benefit from a dose of lime several weeks before planting to help make nutrients available to plants. If you are going for the container option then use a nutrient rich but ‘free draining’ compost with perhaps a spade-full of grit mixed into it. Planting depths and distances are the same as in bed planting.
Sow & plant
Sow & Plant
Buy UK grown organic or seed garlic. The puny white stuff in the supermarkets is often from overseas and has been treated to stop it from sprouting during its long journey and ensuing storage time. Head to your local health food shop, farmers market or garden centre and choose cloves that are tight, fat and fit – like a personal trainer’s biceps – and avoid anything that is soft or spongy. Always pick the best from your bunches as this will grow the greatest garlic.
Once you have separated your bulbs by prizing the cloves apart from their central base and anchoring stem (keeping the skin on) lay your cloves about a finger length apart if they are small or a finger and a half apart if they are big. Do this in a line to make a row, then space your rows at least a hand’s length apart.
I like to place all my cloves on top of the bed just so that I can do a final check on spacing before I push them beneath the surface. Using a trowel, butter knife, piece of kindling – or something else thin and handy – make a small hole about twice the height of the clove itself and pop in your clove so that it sits comfortably fat end down with pointy end up. Do the whole row before back-tracking and softly closing the soil over your treasure trove.
Container planting:
What is also fairly handy is that you can plant garlic in buckets or containers that are bucket-sized or bigger. Make sure there are holes in the bottom for drainage and fill with a good quality potting mix and added compost. Plant your garlic as directed above and be sure to monitor watering closely as soil in buckets and pots dries out much quicker than in beds.
Maintain
Keep an eye on your newly-planted garlic because inquisitive birds will often pull up a few cloves – just re-plant them if this happens. If it goes on too much you can alway cover with light mesh or fleece until the green shoots arrive. Within a few weeks you should see little green shoots – a bit like serpent’s tongues – rising up through the soil. When it looks like all are up you can spread a layer of mulch (about a thumb’s depth) across the planted areas – without bending over or burying any shoots. This will to help keep moisture in, maintain a constant temperature and prevent weeds that might otherwise turn up and start pilfering the soil’s store of nutrients from your garlic.
You shouldn’t have to do any watering during winter but come spring you might have to during dry periods. Ideally you should use about a watering can full for every 30 green shoots. Remember, the water has to soak about the length of your middle finger down into the soil to be of use to the bulbs below. Do this every other day when its dry. Garlic is fairly greedy and needs to be well-fed between March and May – so a diluted dose of worm-juice or liquid manure every couple of weeks will surely be welcome.
Aphids can be a problem. As soon as you notice an infestation treat with Neem oil or Tomato leaf spray. The garlic component in Garlic oil spray doesn’t work when used on garlic plants but the washing up liquid in it should still kill aphids.
Often around May the shoots of Hardneck garlic varieties – which are looking pretty leek-like by now – will push up a scape – or flower stem – looking a bit like a green gnome’s hat. This can freak you out when it first happens but fear not, for many they are a delicacy. Just break them off as they appear and chuck them in a salad, a soup – or pickle them. Keep an eye out over the following few weeks till it looks like all that are going to flower, have flowered. If you don’t break off these shoots then plants will put all their effort into flowering and setting seed resulting in puny cloves in the ground below.
Stop feeding and watering in May so that the bulbs can get on with swelling and drawing the energy in those healthy green leaves back down below ground. This will in turn cause the tips of the leaves to begin to yellow and then turn brown.
Harvest or pick
Sometime around late June to mid August on a sunny day hopefully you’ll find yourself pulling up your garlic to reveal fat, knuckly fists of fresh and feisty garlic. Use some straight away and spread your surplus on the soil or hang it up somewhere to dry – probably not the airing cupboard, unless you are keen on onion-scented towels and linen – and more preferably the greenhouse, garage or garden shed where air can circulate. After a couple of weeks you can trim off the wilted and dried leaves and then plait them or thread them onto a piece of wire to be hung until needed.